Tag Archives: homemade

Healthy Veggie Omelette

Healthy Veggie OmeletteI normally think of an Omelette as something for  breakfast, but with the addition of more vegetables it can also be a great light meal or lunch. While this variation uses zucchini and spinach, you can pretty much use any vegetables you like to use up what you have left over in your fridge.

Ingredients

  • 4 eggs, beaten
  • 100ml coconut milk
  • 1 red onion, finely chopped
  • 1 garlic clove, finely chopped
  • handful of mushrooms, chopped
  • handful of cherry tomatoes, chopped
  • 1 carrot, finely chopped
  • sea salt
  • freshly ground black pepper
  • 1/2 Tbsp dried Italian herbs (thyme, oregano, mix)
  • 1/2 tsp dried oregano
  • large pinch of ground paprika
  • 150gr baby spinach
  • handful of cashew nuts, roasted and chopped
  • large pinch of dried chilli flakes
  • coconut oil to cook
  • Pan that can be placed in the oven (no plastic handle)

Directions

  1. Heat the oven to 180 degrees Celsius (350 degrees Fahrenheit)
  2. Beat the eggs and coconut milk together in a bowl and set aside.
  3. Add all of the chopped vegetables (mushrooms, tomatoes and carrot) to the pan, and fry on a medium heat for a couple of minutes until softened.
  4. Add salt and pepper, Italian herbs, oregano and paprika and stir well.
  5. Add the spinach and toss until slightly wilted.
  6. Sprinkle over the cashew nuts
  7. Add the egg mixture and sprinkle the chilli powder over the top. Fry until it starts to set.
  8. Transfer the pan to the oven and bake for 5-10 minutes until the egg is set through. You can check by inserting a fork into the Omelette, it should come out clean when it is cooked through.
  9. Serve with a simple lettuce salad.

Music to go with it…
Listen on Spotify: Hozier – Take me to Church

Korean Carrot Salad

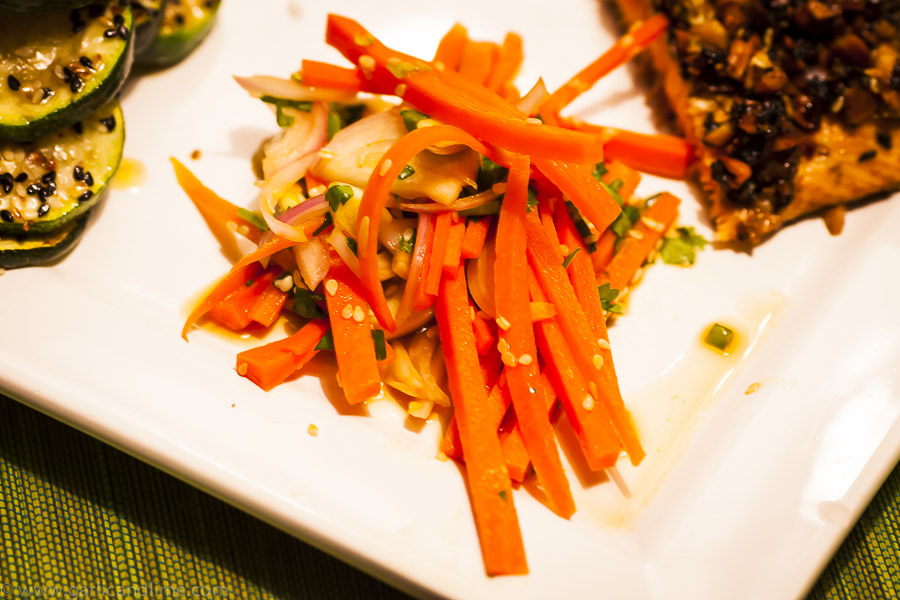
Korean carrot salad

Living in Asia gives us the opportunity to explore its many flavours. The Korean kitchen is one we have been exploring more of recently. This is a very fresh tasting salad using all raw ingredients. It is easy to make, and fits into a vegan, vegetarian, or paleo lifestyle.

Ingredients

  • 1 large carrot, sliced into thin sticks
  • 1 red onion, thinly sliced
  • 2-3 spring onions, chopped
  • 2 garlic cloves, minced and chopped
  • handful of fresh coriander, chopped
  • 2 Tbsp coconut aminos (or soy sauce)
  • 2 tsp sesame seeds
  • 1 tsp hot sesame oil (or 1 tsp sesame oil and 1 tsp chili flakes)
  • pinch of salt

Directions

  1. Place the carrot, onion, spring onions, garlic and coriander into a bowl.
  2. Mix together the coconut aminos, sesame seeds and sesame oil in a small bowl to create the dressing.
  3. Stir the dressing through the salad.

Music to go with it…
Listen on Spotify: Mahoney Harris – We Didn’t Feel Alone

Desiccated Coconut Milk

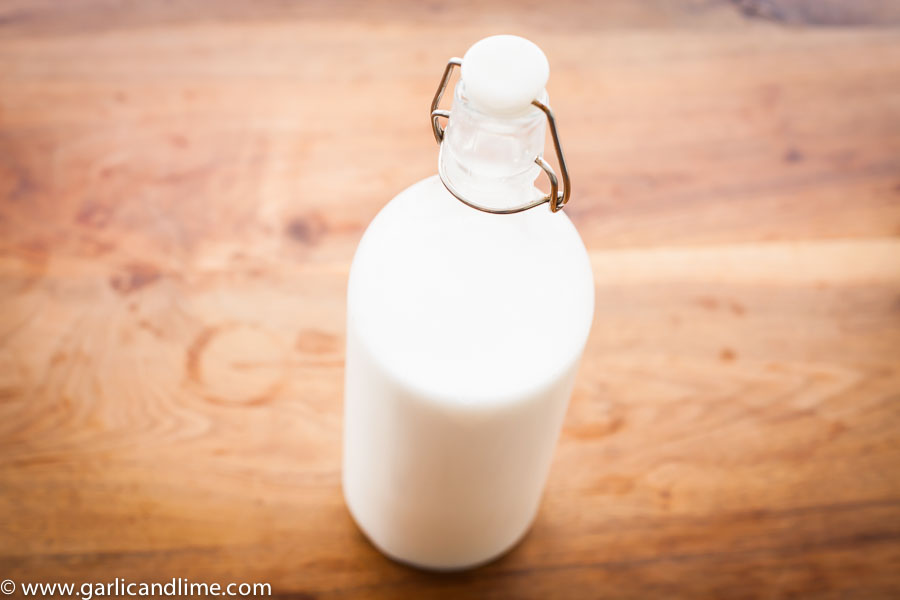
Desiccated Coconut Milk

Recently for some strange reason we could not find any of the brand of coconut milk that we normally buy. It seemed to be sold out of all of the shops near our home. We looked at the labels of a lot of other brands of coconut milk, but were not happy with what we saw. In addition to a stabilizer, many had preservatives in them, and some other ingredients we didn’t understand.

Around the same time we ended up buying a whole pile of desiccated coconut on a shopping trip to the Indian wholesaler only to find when we got home that we already had quite a lot sitting at the back of the cupboard. OK, so let’s try combining the two and making our own coconut milk! Actually it is pretty simple, and using a blender it is also very fast. No more preservatives or stabilizers in this lot!

This recipe makes both thick and thin coconut milk, in the two presses of the coconut. I recommend that you press them into separate bowls and retain them separately for use in different recipes. The thick coconut milk can be used to replace cream, while the thin coconut milk can be used as a milk replacement in many dishes.

Ingredients

  • 180g desiccated (shredded) coconut
  • 1.25L hot water (5 cups)

Directions

  1. Put the desiccated coconut and half of the water (625ml / 2 1/2 cups) of hot water into a blender.
  2. Blend on high speed for 30 seconds.
  3. Pour the water and coconut mixture out over a fine sieve or a piece of muslin cloth (you could also use a fine tea cloth) with a bowl underneath.
  4. Squeeze all of the excess moisture out by squeezing the coconut in the cloth, or by pressing the coconut with the back of a spoon in the sieve.
  5. This first press of the coconut mixture will be thicker and creamier than the second press of the coconut mixture.
  6. Return the coconut to the blender and put the rest of the hot water in with it (625ml / 2 1/2 cups).
  7. Blend again on high for for 30 seconds
  8. Pour the second lot of water out over a fine sieve or piece of cloth, and a fresh bowl.
  9. This second press of the coconut mixture will be a thin coconut milk, but will normally be more than the first press of the coconut.
  10. Store the thick and thin coconut mixtures separately in airtight containers in the fridge, and use in soups, curries, or beverages.

Music to go with it…
Listen on Spotify: The Mountain Goats – Beat the Champ

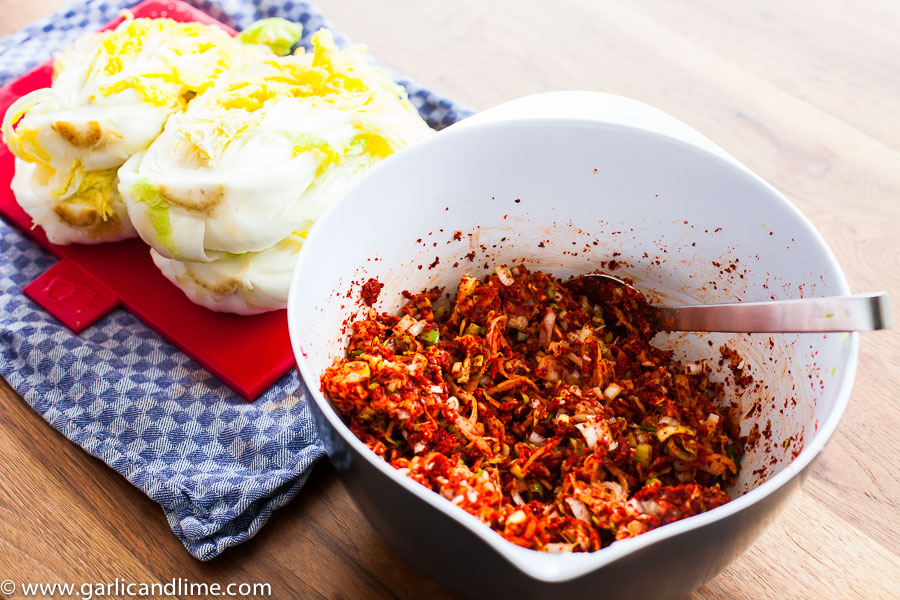
Homemade Korean Kimchi

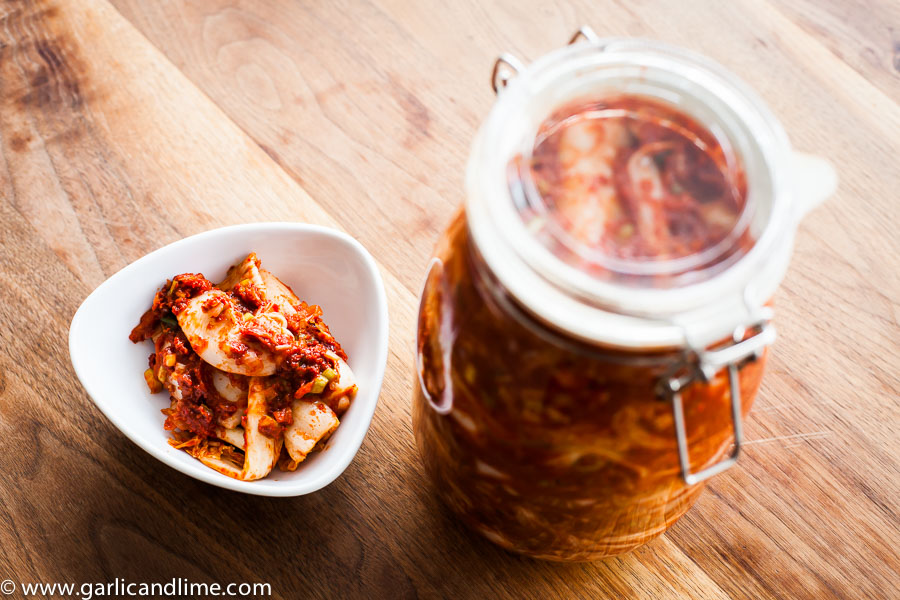
Homemade Korean Kimchi

One of our son’s best friends at school is Korean, and his mother was nice enough to give us some Korean gochugaru chilli powder. We had been talking to her about how much we loved Korean food, and that we were keen to try making our own Kimchi. After convincing her to swap a BBQ for a Korean dinner at her place, she decided it was our time to cook next and gifted us the chilli powder to make the much talked about Kimchi.

Kimchi is a fermented vegetable dish, much like sauerkraut, except spicy.  The national dish of Korea (and a national obsession), no Korean meal is complete without it. The fermentation process of making it also makes it great for your gut health and there are many studies on its health benefits.

There is no definitive recipe for Kimchi, rather you can make a lot of variations of the basic recipe. Adding carrot or cucumber are some suggestions to get you started. Enjoy!

Ingredients

  • 2 kg Chinese leaf cabbage
  • 200g sea salt

Kimchi paste

  • 150g gochugaru, Korean Chilli Powder (do not substitute for regular chilli powder as this is more like a paprika powder, with a little chilli added. Regular chilli powder would be far too hot)
  • 300g leek, finely chopped
  • 2 Tbsp garlic, minced
  • 2 Tbsp ginger, finely grated
  • 200g fresh daikon / mooli radish, grate on wide grater, or finely shred (you could substitute for regular radish, but cut it is a little more intense in flavour, so decrease the amount and cut it up finely)
  • 1 Tbsp fish sauce
  • 1-2 Tbsp salt

Directions

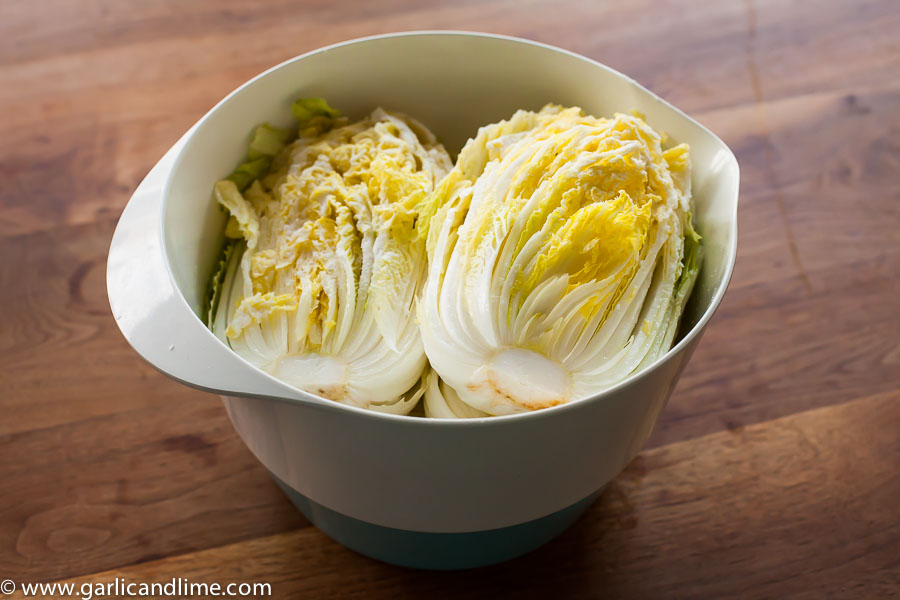
  • Cut the Chinese cabbage in half lengthwise to expose all of the leaves. Place the halves cut side up in a bowl. Salt the cabbage layer by layer. You don’t have to be too perfect at this.

Korean Kimchi

  • Place into a large bowl and cover with enough water to completely submerge it. Place a heave object on top to keep the cabbage submerged under water. I used a pestle, but you could use a bowl, plate, or jar as well.
  • Repeat for each of the cabbage halves until you have used up all of the salt and roughly salted all of the cabbage leaves
  • Cover with a tea-towel and let it stand for 24 hours at room temperature in the brine mixture.
  • Drain the water and taste a bit of the cabbage from the middle to check for how salty it has become.
  • A good kimchi contains enough salt, but to get it right it is important to taste it. If it is very salty then you need to rinse it more. Rinse it multiple times, tasting from a middle leaf each time until it is just too salty for your taste. If it tastes salty enough for your taste, then it is probably not salty enough, and you should add more salt to the mixture (2 Tbsp rather than 1 Tbsp) when you are making the kimchi paste.
  • Carefully squeeze the liquid out of the Chinese cabbage
  • Mix together all of the kimchi paste ingredients in a bowl.

Korean Kimchi

  • Either you can leave the cabbage halves still whole, or you can cut the ends off them in order to separate the leaves. I cut the ends off to make it easier to put them into the jar that I had available.
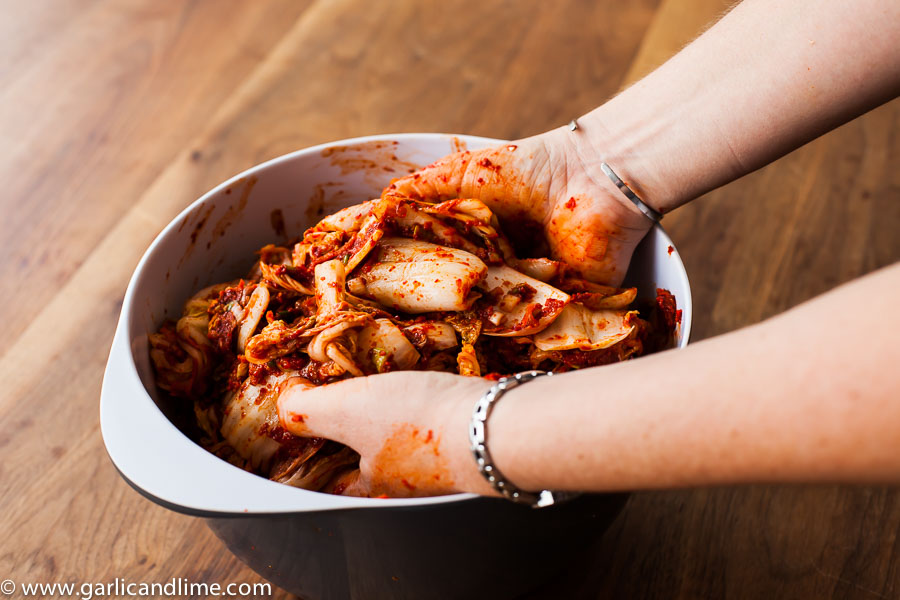
  • Mix the Chinese cabbage and kimchi paste thoroughly with your hands. It will wash off easily, and there isn’t really a good substitute to just getting in there and getting dirty!

Homemade Korean Kimchi

  • If you are leaving the cabbage halves whole, then make sure that you lift the leaves up and press the paste in between them.
  • Place the kimchi into a jar or bowl with a tight fitting lid. Press into the container so that it is tightly packed, but don’t use too much force in doing so. You just want to press it into the container to completely fill it.
  • Leave the kimchi to stand on the bench for 24 hours.
  • Transfer to the fridge and leave it for 7-10 days before you start to eat it.
  • It will last for around 2 months in the fridge.

Music to go with it…
Listen on Spotify: The Very Best – Makes a King

Dukkah (Duqqa)

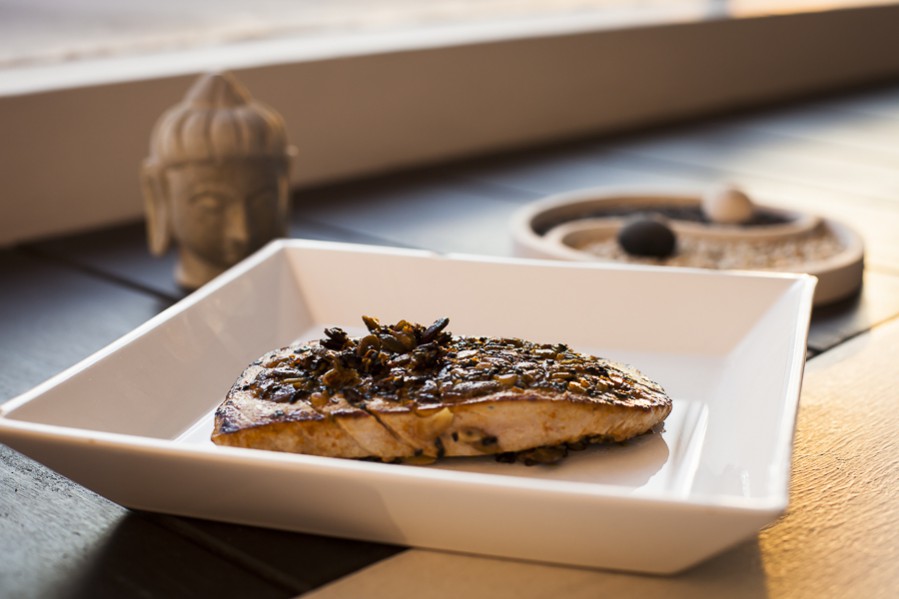
Dukkah crusted tuna

Dukkah is a classic Middle Eastern blend of spices, seeds and herbs. Originating in Egypt, there is no definitive recipe, with each home and store offering their unique blend. At its most simple it is a blend of mint, salt and pepper. It can be used as a topping for meat such as salmon, tuna or chicken, but can also be used as a dipping for bread (turkish flat bread is a good choice) or vegetables for a crunchy starter.

Ingredients

  • 1/2 tsp Cloves
  • 1 tsp Fennel seeds
  • 1 tsp Coriander seeds
  • 1 tsp Cumin seeds
  • 1 tsp Paprika
  • 1/4 tsp Turmeric
  • 1/2 tsp chili flakes
  • Handful of chopped pine nuts, toasted
  • Handful of chopped almonds, toasted
  • Handful of chopped cashew nuts, toasted
  • 1/2 tbsp White sesame seeds
  • 1/2 tbsp Black sesame seeds
  • 2 tbsp Honey
  • Juice of 1 orange
  • Sea salt
  • Black pepper

Directions

  1. Toast the seeds in a a pan for around 30 seconds or until fragrant.
  2. Transfer the seeds to a spice grinder (or mortar and pestle) and grind until you have a coarse powder.
  3. Transfer to a little bowl, add all other ingredients and mix.
  4. Use as a topping for meat, or with olive oil as a dipping for bread or vegetables

Music to go with it…
Listen on Spotify: Intergalactic Lovers – Little Heavy Burdens

Green Mango Salad

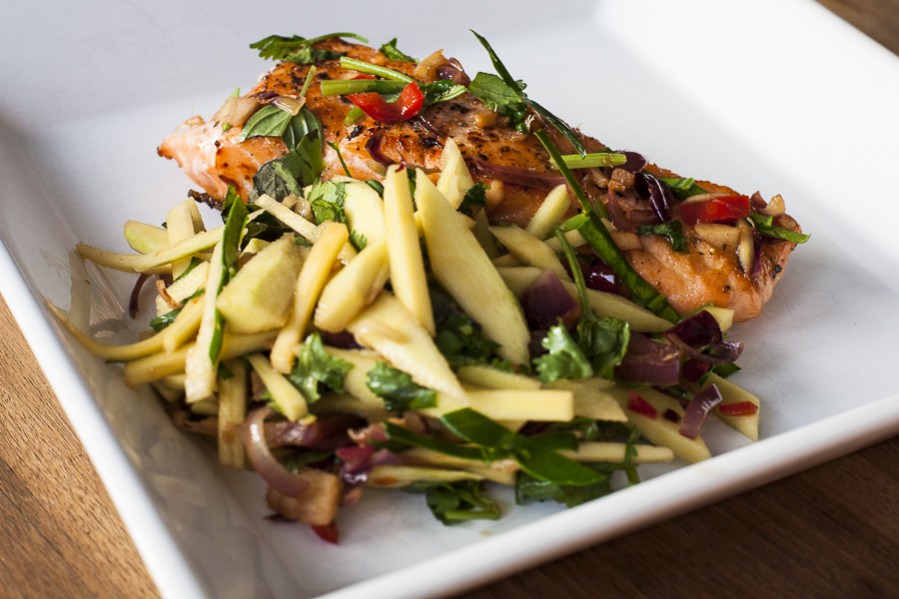
Green Mango Salad

We love Thai food and this green mango salad is a simplified version that is made sugar and soy free through the use of maple syrup and coconut aminos. It is great served with a Thai Green Chicken Curry or a Thai Pumpkin and Mushroom Curry.

Ingredients

  • Coconut oil
  • 5 red shallots, finely chopped
  • 2 cm fresh galangal, finely chopped
  • 1 red chilli, chopped (deseeded when using a hot chilli)
  • 2 garlic cloves, chopped
  • 1,5 tbsp coconut aminos
  • 1/4 tsp maple syrup
  • Splash of water
  • Squeeze of lime juice
  • 1 raw green mango, peeled and cut into thin strips of 3 cm long
  • Handful fresh coriander, roughly copped
  • Few Thai basil leaves
  • 3 kaffir lime leaves, finely chopped and with the middle stem of the leaf removed

Directions

  1. Fry the shallots, garlic, galangal and chilli in a little coconut oil for about three minutes.
  2. Add the coconut aminos, maple syrup, water and lime juice and give it a stir.
  3. Take the pan of the heat and add the mango, coriander, basil and kaffir lime.
  4. Mix well and serve with grilled salmon, Thai Green Chicken Curry or a Thai Pumpkin and Mushroom Curry.

Music to go with it…
Listen on Spotify: Midlake – Antiphon

Lebanese Chicken Salad

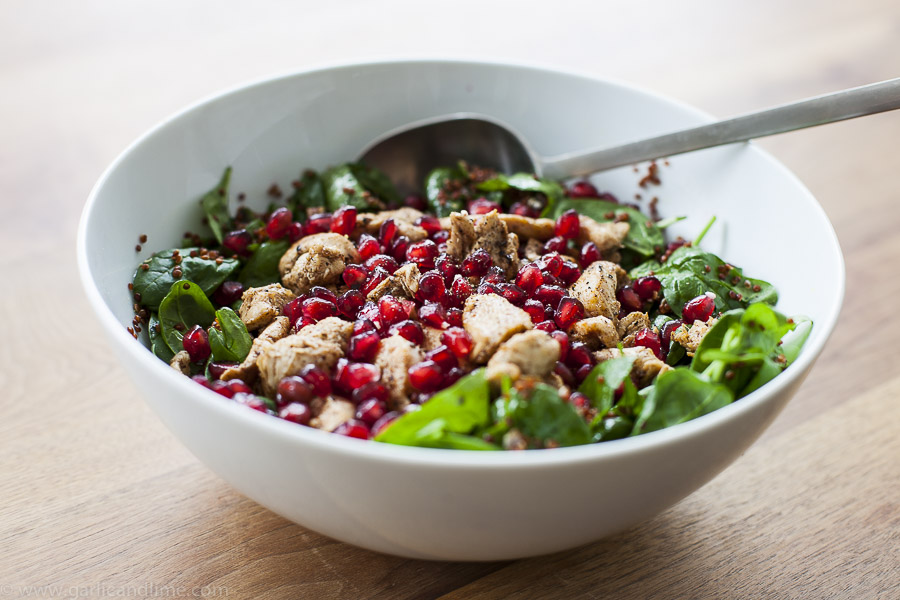
Lebanese Chicken Salad

Living in a hot climate we eat a lot of salads, and are always looking for new ideas to keep the meal interesting. This one combines chicken marinated in Lebanese Seven Spice Mix with a honey mustard dressing. You can make your own mustard at home or use store bought wholegrain mustard.

Ingredients

  • 2 chicken breasts
  • 1 tsp Lebanese 7 spice powder
  • 1 Tbsp olive oil
  • 150g baby spinach leaves (or other lettuce leaves)
  • 1/2 cucumber, cut into chunks of 1cm
  • 5 radishes, sliced thinly (optional)
  • 1/2 a pomegranate, seeds removed
  • optional – you could also add some feta cheese

Honey Mustard Dressing

  • 3 Tbsp olive oil
  • 1 Tbsp white wine vinegar
  • 1 tsp wholegrain mustard
  • sea salt
  • freshly ground black pepper

Directions

  1. Cut the chicken breasts into 1 cm strips. Place in a bowl
  2. Add the Lebanese seven spice powder and 1 Tbsp olive oil to the chicken. Sprinkle over a pinch of sea salt and some freshly ground black pepper. Stir to combine as a marinade.
  3. Pan fry the chicken over a moderate heat until it begins to turn golden brown. Remove from the heat and set aside.
  4. Wash the baby spinach leaves (or lettuce), and place the spinach, cucumber, and radish in a serving bowl.
  5. To make the honey mustard dressing, place the honey, mustard, olive oil, white wine vinegar, a pinch of sea salt and a few grinds of black pepper into a glass or jar. Stir well to combine (or shake to combine in a jar).
  6. Pour the dressing over the salad and toss the salad to coat all leaves.
  7. Spread the chicken over the top of the salad.
  8. Sprinkle with pomegranate seeds (and feta if you are using it)
  9. Serve the salad as a light meal for 2 people

Music to go with it…
Listen on Spotify: Peter Bjorn and John – Gimme Some

Homemade Mustard

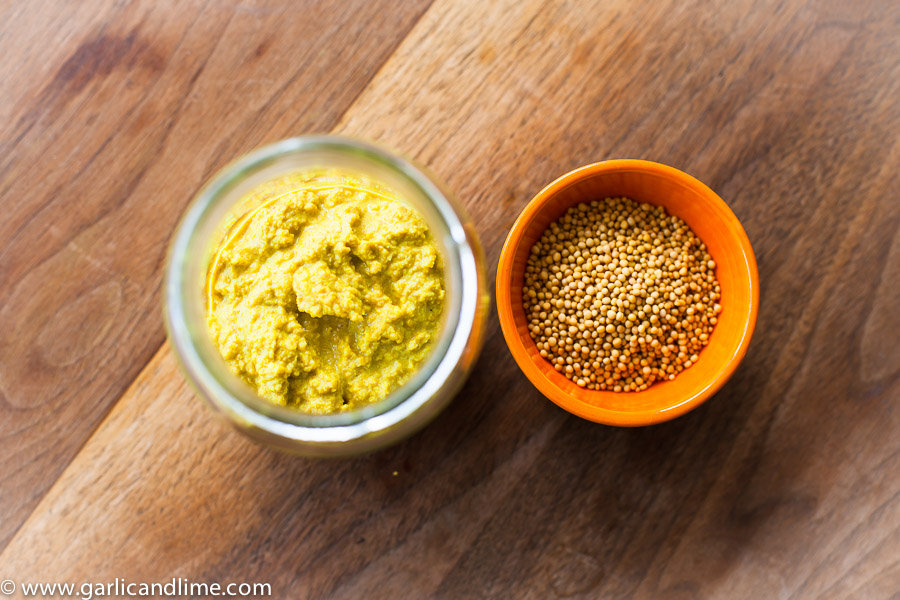
Homemade mustard

I wanted to make a sweet potato salad with a honey mustard dressing, but in looking at the pots of mustard I started finding a whole pile of ingredients that I didn’t recognize. Thinking it must be possible to make myself, I started exploring making different types of mustard. This is a basic recipe and you can vary it with different types of mustard seeds, and by adding more or less honey to make it sweeter. A little warning, it is quite spicy immediately after you blend it, so beware of using too much too soon.

Ingredients

Directions

  1. Add the mustard seeds, vinegar and water to a jar. Do not cover it, and let it stand on the bench top for 24-48 hours. (If you forget about it, then it is OK to leave it like this for up to a week.)
  2. The mustard seeds should have absorbed most of the water and vinegar before you move to the next step (this might take more or less time depending on your mustard seeds)
  3. Place the mustard seeds mixture, turmeric, salt, and honey into a blender and blend for about 2 minutes. You can blend a shorter or longer time depending on whether you prefer a smooth or more chunky mustard.
  4. Place the mustard into a sealed jar, and put it in the fridge. Let it sit for a couple of days before you eat it, as the taste will mellow and all the flavours will meld together the longer it stands.
  • Note: that the inclusion of the turmeric is only to give it a yellow colour. You can leave it out if you like, and then the mustard will be a beige colour.
  • Note: You can add more honey if you prefer the mustard a little sweeter. Try it first with 2 Tbsp, and add more later after you have let it stand for a couple of days if you prefer.

Music to go with it…
Listen on Spotify: Lower Dens – Escape from Evil

Paleo Eggs Benedict

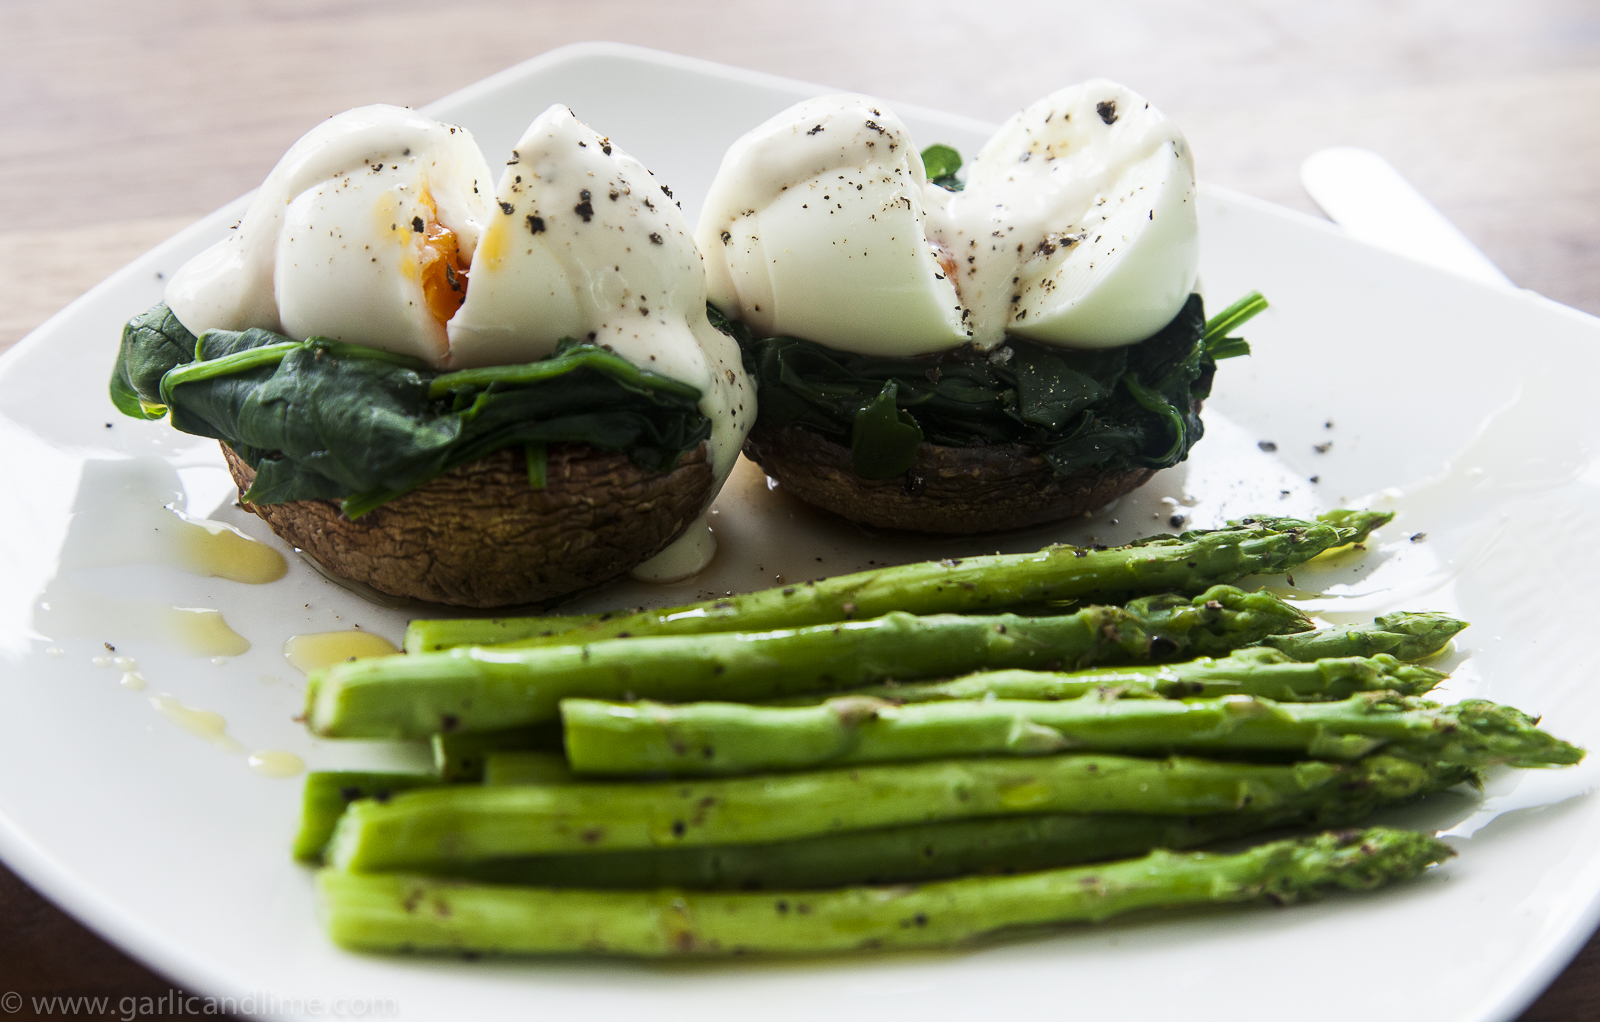
Paleo Eggs Benedict

Some mornings call for a hearty breakfast. Living in New Zealand, Eggs Benedict is a classic that you find on almost every cafe menu, and for which you find almost as many variations. This one uses mushrooms instead of bread, and you could add grilled or smoked salmon or pan fried bacon to this recipe if you like.

Ingredients

Directions

  1. Prepare the mayonnaise using the homemade mayonnaise recipe.
  2. Mushrooms: Cut out the stems of the mushrooms to give an open well. Sprinkle with sea salt, freshly ground black pepper and a little olive or coconut oil
  3. Cook the portobello mushrooms in an Air Fryer for 5 minutes at 200 degrees Celsius (400 degrees Fahrenheit), or in a hot oven for 10 minutes at 200 degrees Celsius (400 degrees Fahrenheit).
  4. Eggs: You can either boil or poach the eggs. I found it easier to boil them as I didn’t have to watch over them and could prepare the rest at the same time. Boil the eggs for 6 minutes in a pot of boiling water (for eggs that are still a little runny), or poach them until they are cooked to your liking.
  5. Wash the spinach in leave to sit in a draining colander.
  6. Asparagus: Heat a grill pan over a medium to high heat. Trim the ends off the asparagus. Sprinkle the asparagus with a little sea salt and freshly ground black pepper. Cook at a medium high heat for 4 minutes, stirring frequently to avoid burning. When the asparagus is cooked, remove it from the pan.
  7. Spinach: In the same pan that you cooked the asparagus in, add the spinach (which should still be a little damp, but not wet from washing it) to the pan and stir quickly. It will cook rapidly in the steam of the water that you used to wash it in. Cook it only long enough so that it wilts. Do not overcook. It will take about 1 minute.
  8. Putting it together: Place the portobello mushrooms on a plate. Spoon 1/4 of the spinach into each of the mushrooms. Shape the spinach a little to make a little well if you have boiled the eggs so that they do not fall off. Top each mushroom with the peeled boiled egg, or poached egg. Drizzle over some homemade mayonnaise. Grind over a little more black pepper and a sprinkle of sea salt. Serve with the grilled asparagus for a hearty breakfast.
  9. Serves 2 people.

Music to go with it… we’ve paired it with another kiwi classic – Bic Runga
Listen on Spotify: Bic Runga – Anthology

Homemade Mayonnaise

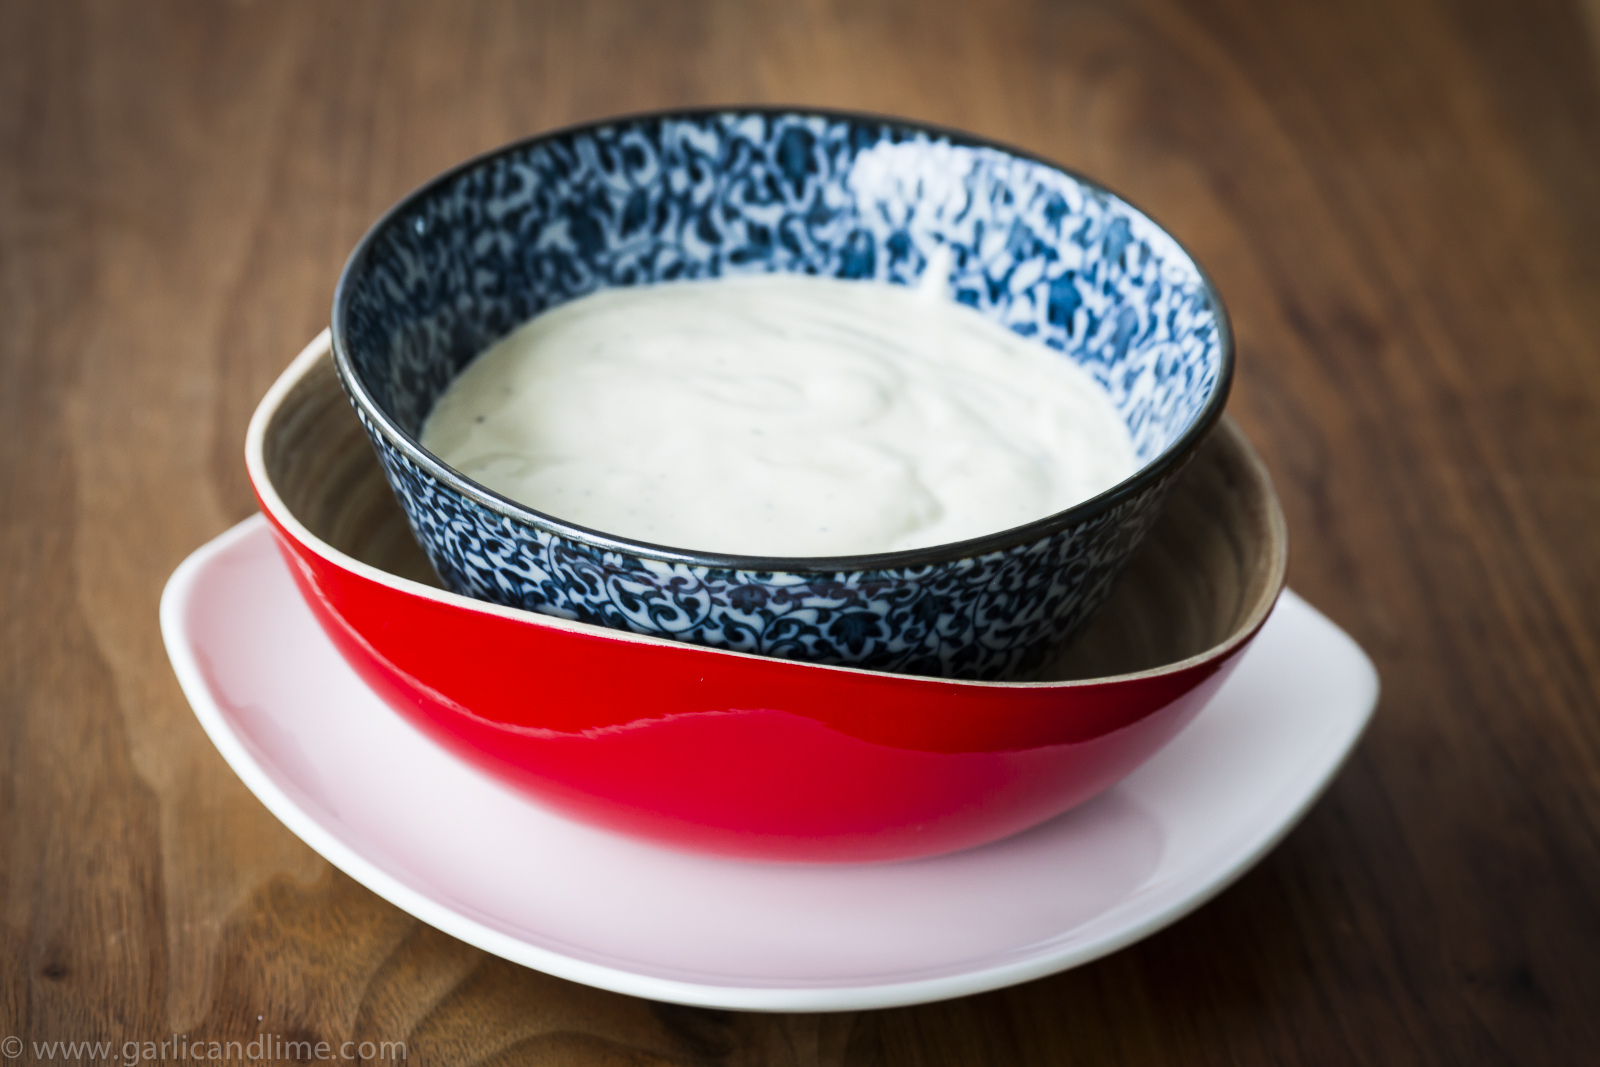
Homemade wholefood paleo mayonnaise

I was quickly whipping up a jar of mayonnaise this morning to go over an Eggs Benedict breakfast, when I wondered why we ever bought Mayonnaise? It is so easy to make, and doing so means we avoid all the processed ingredients in the store bought stuff. For sure I am never going back.

Ingredients

  • 1 large egg (preferably organic)
  • 1 Tbsp freshly squeezed lemon juice (1/2 a lemon)
  • 1/2 tsp sea salt
  • freshly ground black pepper
  • 150ml olive oil (preferably not extra virgin)

Directions

  1. Place the egg, lemon juice, sea salt, and pepper in a blender
  2. Blend all of the ingredients, starting on a slow speed while you add the olive oil to avoid spattering it all around your kitchen.
  3. Add the olive oil while the blender is running in a slow stream. I suggest that you don’t remove the lid of the blender, but just lift it enough to be able to pour the olive oil in underneath it while the blender is running.
  4. Put the cap back on the blender and turn up the speed. Blend the mayonnaise until it has formed into thick emulsion. This will not take very long, do not over blend it.
  5. Can be used as a replacement for hollandaise sauce on an eggs Benedict, with sweet potatoes, or as a dressing.

Music to go with it…
Listen on Spotify: Mahoney Harris – We Didn’t Feel Alone